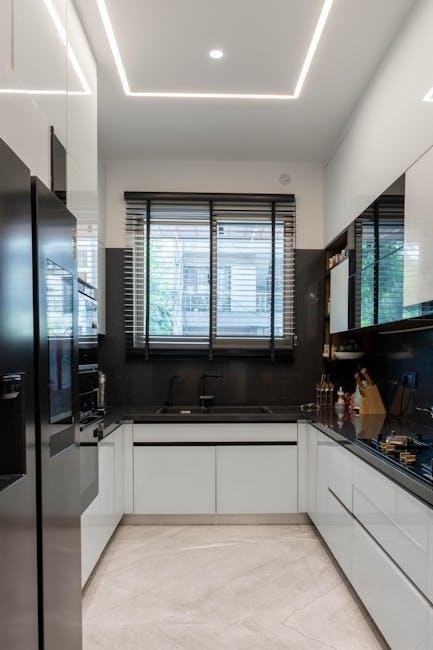
Roman blinds are a popular choice for window treatments, offering versatility and style. Available in various fabrics, they provide light control and privacy while enhancing room aesthetics. Fitting them is straightforward with proper tools and guidance, ensuring a perfect fit and functionality. Follow the step-by-step guide for a seamless installation experience.
Overview of Roman Blinds and Their Benefits
Roman blinds are a timeless and versatile window treatment, offering both style and functionality. Available in a wide range of fabrics, from sheer to blackout, they provide excellent light control, privacy, and insulation. Their elegant fold design enhances any room’s décor while maintaining a clean, modern aesthetic. Roman blinds are also energy-efficient, helping to reduce heat loss in winter and block sunlight in summer. With options for corded, cordless, or motorized operation, they cater to diverse preferences and lifestyles, making them a practical and stylish choice for any home.
Importance of Proper Fitting for Functionality and Safety
Proper fitting of Roman blinds is crucial for both functionality and safety. A well-installed blind ensures smooth operation, preventing fabric sagging or mechanism failure. Securely fitted brackets prevent the blind from detaching, reducing the risk of accidents, especially in homes with children or pets. Accurate measurements and correct installation techniques also optimize light control and energy efficiency, enhancing overall performance and longevity of the blinds. Improper fitting can lead to safety hazards and reduced functionality, making precise installation essential.
Measuring Your Windows for Perfect Fit
Accurate measurements are essential for a seamless fit. Use a tape measure to record width and height, considering the mounting method—top-fixing or face-fixing—to ensure proper functionality.
How to Accurately Measure Window Dimensions
Use a tape measure to record the width and height of your window opening. Measure the width at three points: top, middle, and bottom, and note the smallest measurement for a snug fit. For the height, measure from the top of the window frame to the sill. If top-fixing, include the lintel depth; for face-fixing, measure the wall area above the window. Ensure all measurements are precise to guarantee a perfect fit for your Roman blind. Double-check for squareness to avoid installation issues later.
Understanding Fabric and Headrail Requirements
Choose fabric that suits your style and functional needs, from light veils to heavy blackout materials. The headrail is the core component, housing the control mechanism and supporting the fabric. Ensure the fabric is compatible with your chosen headrail type, whether corded, cordless, or motorized. Accurate measurements of both fabric and headrail are crucial for a seamless fit. Proper pairing ensures smooth operation and longevity of your Roman blind, while incorrect sizing may lead to functional issues. Always refer to your specific blind’s specifications for optimal results.

Preparing Tools and Materials
Preparing tools and materials is simple. Your Blinds To Go Roman blind kit includes everything needed, like brackets, screws, and headrail. No special tools required for installation.
Essential Tools Needed for Installation
Essential tools for installing Blinds To Go Roman blinds include a drill, screwdriver, measuring tape, and level. Additional tools like pliers or an Allen key may be needed for specific mechanisms. Ensure all tools are readily available to streamline the process. The kit typically includes brackets, screws, and other necessary hardware, minimizing the need for extra materials. Proper tools ensure a secure and precise installation, avoiding potential fit issues. Keep everything organized for a smooth experience.
Materials Provided with Blinds to Go Roman Blinds

Blinds To Go Roman blinds come with all necessary materials for installation. Each package includes pre-cut fabric, a durable headrail, sturdy brackets, and control mechanisms. Additional components like screws, Velcro strips, and batten are provided. The fabric is pre-attached to the headrail for convenience. All parts are custom-made to ensure a perfect fit. The materials are designed to simplify the installation process, making it efficient and stress-free. Everything needed for a successful setup is included in the kit, ensuring a polished finish.
Understanding Roman Blind Components
Roman blinds consist of key components that ensure functionality and style. The headrail holds the mechanism, while the fabric provides light control and privacy. Control mechanisms, such as cords or motors, operate the blinds smoothly.
Headrail, Brackets, and Fabric Components
The headrail is the top section of the Roman blind, housing the control mechanism. Brackets are essential for securing the headrail to the window frame or ceiling. The fabric is attached to the headrail and folds neatly when raised. Each component is designed for seamless operation, ensuring durability and ease of use. Proper installation of these parts guarantees a smooth and functional blind system, enhancing both privacy and aesthetics in any room.

Control Mechanisms: Corded vs. Cordless vs. Motorized
Roman blinds offer three control mechanisms: corded, cordless, and motorized. Corded systems use a cord to raise and lower the blind, providing a traditional and reliable option. Cordless mechanisms eliminate cords for a sleek look and enhanced safety, especially for homes with children. Motorized systems offer the ultimate convenience, allowing remote or smart control for effortless operation. Each option caters to different preferences and needs, ensuring ease of use and precise control over light and privacy.
Step-by-Step Installation Guide
Installing Roman blinds is straightforward with a step-by-step guide. Secure brackets using top-fixing or face-fixing methods, attach the headrail, and adjust fabric for a perfect fit. Control devices ensure seamless operation.
Fitting the Brackets: Top-Fixing vs. Face-Fixing
Fitting brackets is the first step in installing Roman blinds. Top-fixing involves screwing brackets into the lintel or ceiling, ideal for deep window recesses. Face-fixing attaches brackets directly to the window frame or wall, suitable for shallower areas. Ensure the surface is secure and level for proper fit. Use the provided screws and Gentle swing motion to slot the headrail into place for a firm hold. Both methods ensure stability and ease of use for your Roman blinds, providing a professional finish.
Attaching the Headrail to the Brackets
To attach the headrail, ensure the brackets are securely installed. Align the headrail with the brackets, focusing on the front lip that slots into the bracket. Gently push the headrail until it clicks or locks into place. Check alignment for proper operation and engage any swing arms or mechanisms to secure the headrail firmly. Test by operating the blinds to ensure smooth functionality. Adjustments may be needed for alignment or security to prevent issues over time.
Securing the Fabric to the Headrail
To secure the fabric to the headrail, align the fabric’s top edge with the Velcro or attachment mechanism on the headrail. Peel back the fabric and press it firmly onto the Velcro, ensuring a snug fit. If using a different attachment method, follow the manufacturer’s instructions. Once secured, gently pull the fabric to ensure it is tightly fastened. Adjust the fabric alignment if necessary to ensure even hanging. Test the fabric by raising and lowering the blind to confirm proper attachment and smooth operation.
Installing Control Devices and Final Adjustments
Attach the control device to the headrail, following the manufacturer’s instructions for corded, cordless, or motorized systems. Test the mechanism to ensure smooth operation. Adjust the fabric alignment if necessary to achieve even hanging. Tighten any loose screws and ensure all components are securely fastened. For corded systems, tie the cord securely to the cleat or tension device. Double-check the blind’s movement and make final adjustments for proper functionality and safety. This completes the installation process, ensuring your Roman blind operates smoothly and looks great.

Operating and Maintaining Your Roman Blinds
Operate your Roman blinds using the installed control device, adjusting the fabric gently for light control. Regularly clean the fabric and inspect mechanisms for optimal performance and longevity.
How to Use and Adjust Your Newly Installed Blinds
To operate your Roman blinds, gently pull the cord to raise or lower them, ensuring the fabric aligns evenly. For corded models, the cord typically controls the height, while cordless or motorized options may use a toggle or remote. To release the blinds from the brackets, push the headrail or swing arm as instructed. Regular dusting is recommended; check fabric care labels for washing instructions. Test the blinds after installation to ensure smooth operation and adjust the cord or brackets if necessary for proper alignment and security.

Cleaning and Maintenance Tips for Longevity
Regular cleaning ensures your Roman blinds remain functional and visually appealing. Use a soft brush or vacuum cleaner with a gentle suction setting to remove dust. For spot cleaning, dampen a cloth with water and gently wipe the fabric, avoiding harsh chemicals. For machine-washable fabrics, follow care instructions carefully. Ironing may be needed after washing to restore shape. Avoid exposing blinds to direct moisture or extreme heat, which can damage materials. Routine maintenance extends the lifespan of your blinds, keeping them looking fresh and operating smoothly.

Troubleshooting Common Issues
Common issues include blinds not fitting properly, fabric misalignment, or mechanism malfunctions. Adjust brackets, realign fabric, or consult guides for solutions to ensure optimal functionality and appearance.
Resolving Fit, Fabric, or Mechanism Problems
If your Roman blind doesn’t fit perfectly, check bracket alignment and ensure proper installation. For fabric issues, realign or reattach it to the velcro strips on the headrail. Mechanism problems, such as cord malfunctions, may require adjusting or replacing the control device. Consult the provided instructions or video guides for specific solutions. Gently push or pull components to secure them properly. Ensure all parts are firmly locked into place for smooth operation. Patience and careful adjustment will resolve most common issues effectively.
With proper tools and guidance, installing Roman blinds is straightforward. Follow the steps carefully to ensure a perfect fit and functionality, enhancing your home’s appearance effortlessly.
Final Tips for a Successful Installation
Ensure all brackets are securely fixed and aligned for stability. Double-check measurements and fabric alignment before finalizing. Use gentle motions when attaching the headrail to avoid damage. Test the blinds’ operation to confirm smooth functionality. Regular maintenance, like dusting and adjusting cords, will prolong their lifespan. Follow the provided instructions closely, and don’t hesitate to seek help if issues arise. Proper installation ensures safety, functionality, and aesthetic appeal for your Roman blinds.
 year 7 science test papers with answers pdf free download
  sky princess deck plan pdf
  mk1 bus timetable luton to bedford pdf
  the old man and the sea pdf book
  the diary of a ceo filetype:pdf
  a court of thorns and roses filetype:pdf
  king of the underworld rj kane pdf
  merlin home transmitter manual
  contrat de sous-location québec pdf
  mark cousins the story of film pdf